In the following article, we will go through the steps required to extract a WordPress multisite to a single site instance so that it runs independently from the network. Once separated, this site will have its own WordPress install and will count as a separate site on your Pressable account.
Help with this is outside the scope of Pressable’s Support Policy, which is why we made this document. Our hope is this helps guide you to complete the steps on your own, or hire a developer to follow these steps for you.
Step 1: Clone The Multisite
Your first step will be to clone the existing multisite by following our guide on how to clone your website to staging.
Step 2: Find blog ID and table prefix from phpMyAdmin
Next, you need to log into phpMyAdmin for this (clone) website. We need to make a note of the table prefix used by this site, as well as make a few updates to the overall database structure.
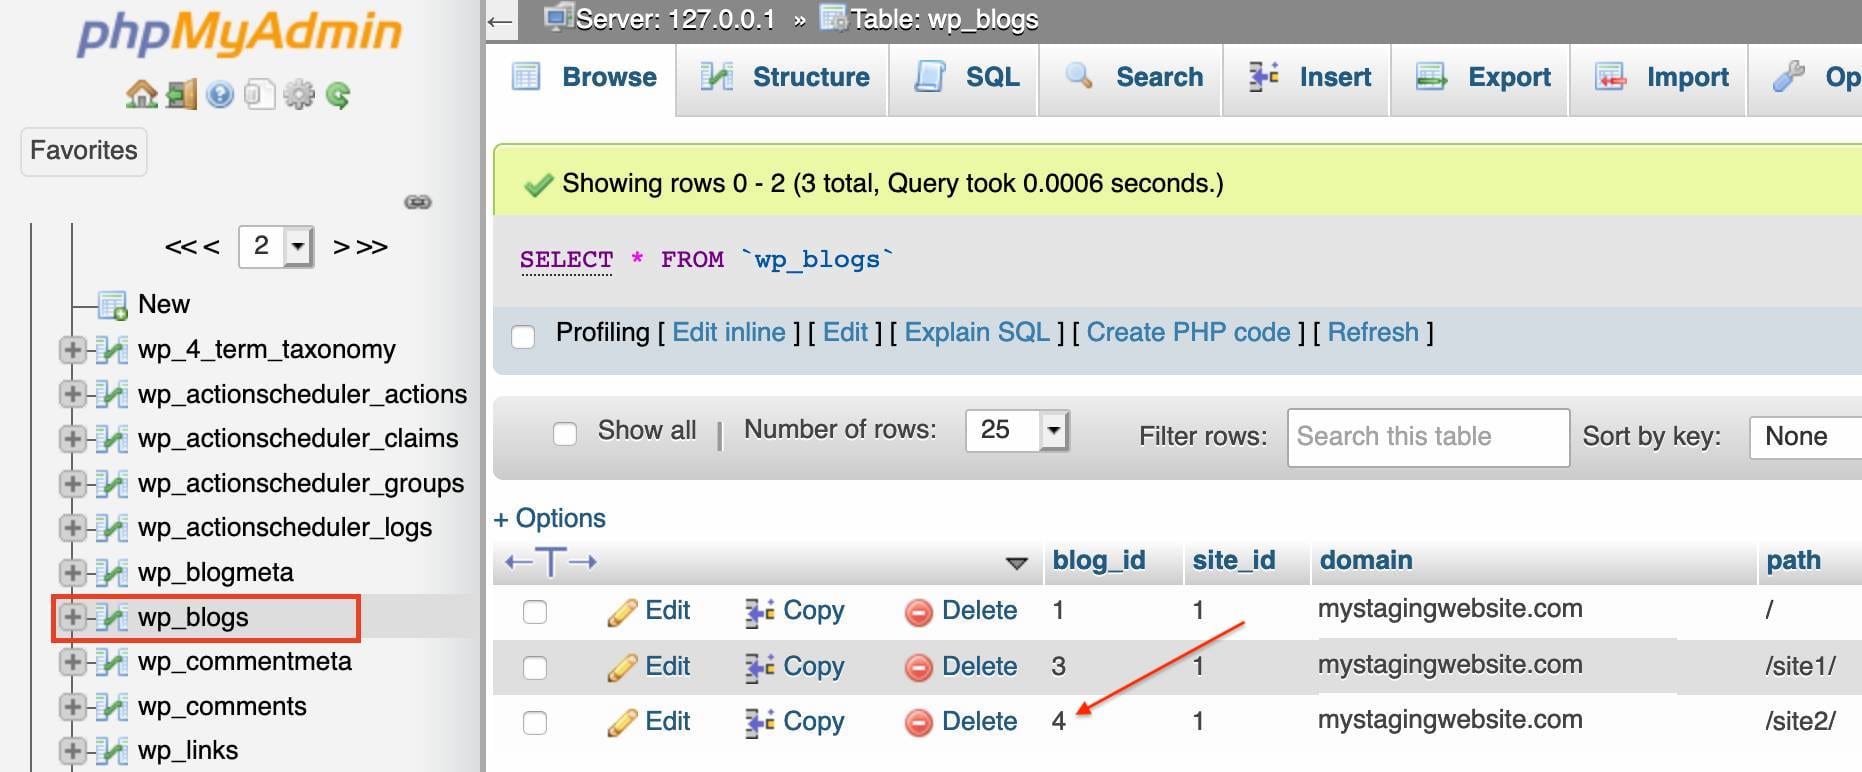
Let’s pretend we need to extract “site2” from this install.
First, navigate to the wp_blogs table. From there you can see the blog ID to the left of the site name. In this case, our blog ID is 4.
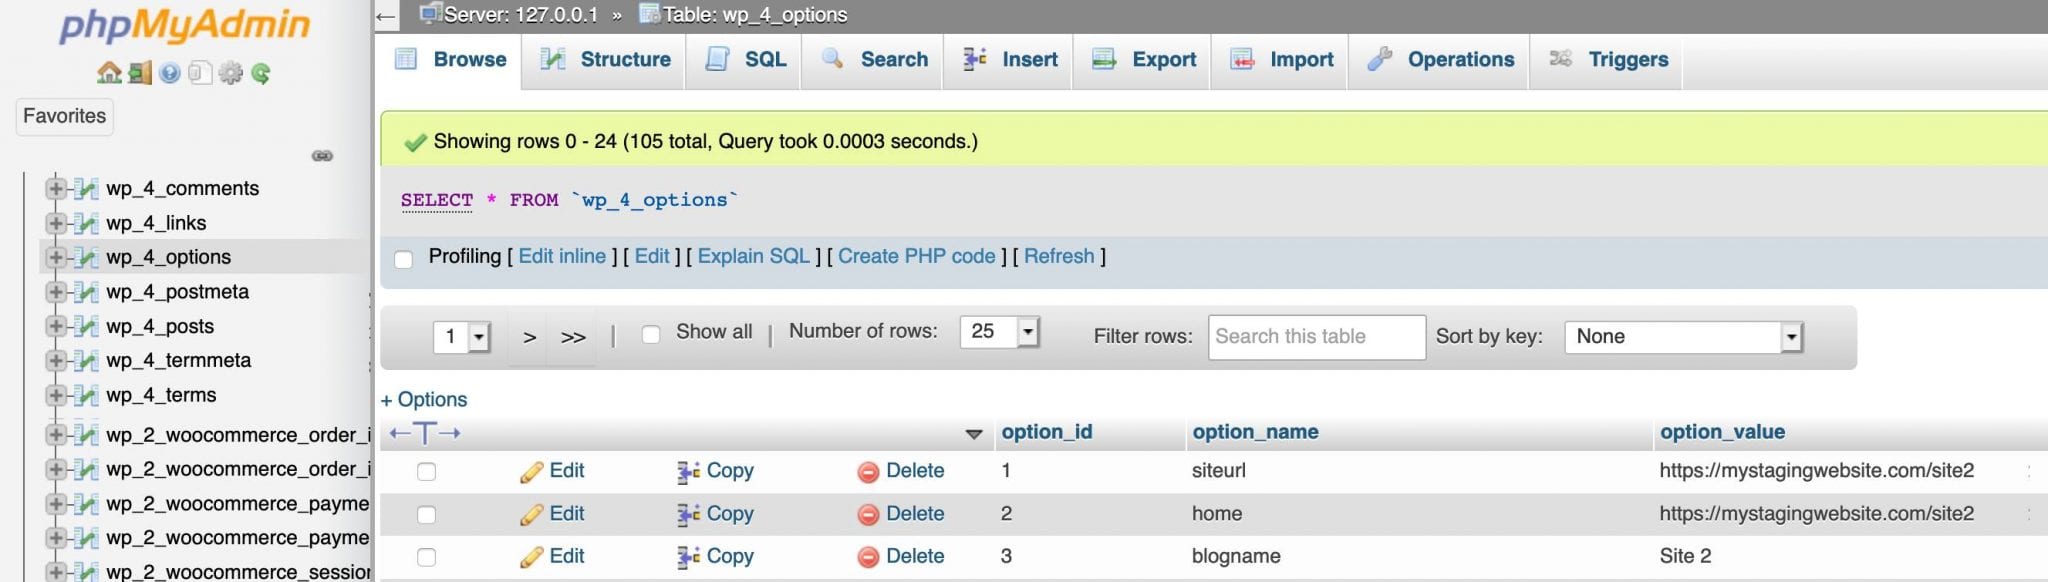
You can verify this by selecting the _options table for that ID. For our site, we can see from wp_4_options that all wp_4_ tables are used by “site2”.
Step 3: Update wp-users and wp-usermeta
You will need to edit the prefix of two tables in the database: wp_users and wp_usermeta. These table names need to match the prefix of the site being extracted. In our case, they will need to be changed to wp_4_users and wp_4_usermeta.
To edit the table prefix, click on the table name, then move to the Operations tab. You can change the prefix in the “Rename table to” field.

Step 4: Edit the wp-config.php File
The next step is to connect to this freshly cloned website via SFTP and open the wp-config.php file. You will need to remove or comment out the section related to the multisite configuration.
Here is an example of how that looks: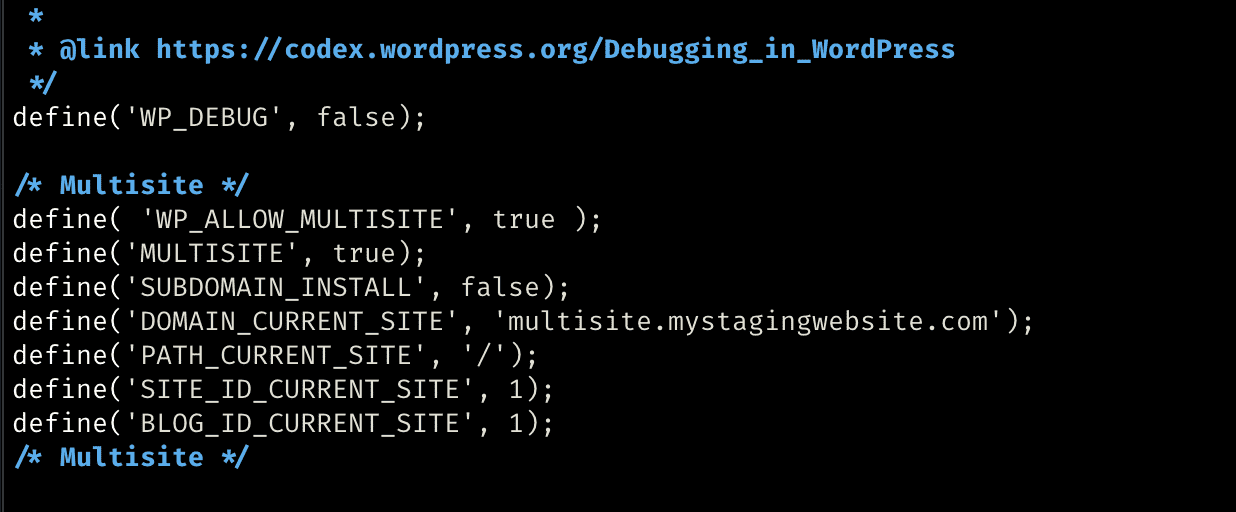
Here is an example of it commented out: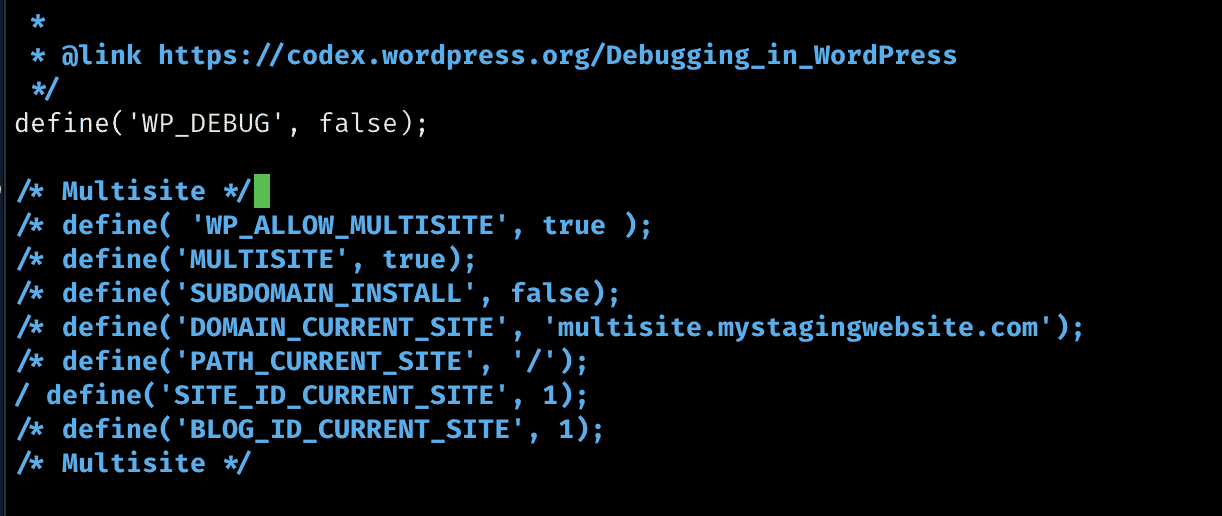
You will then need to change the database table prefix to match that of the site being extracted.

Once done, you can save the changes and upload the file back to the server.
Step 5: Move the Media
You will need to move the media files through SFTP. With multisites, the uploads for each site are stored in their own unique folder. Those files should be moved to the root of the uploads directory, in the same way that other single WordPress installations function. You will find those files in /wp-content/uploads/sites/{{site-id}}.

Step 6: Search and Replace
Finally, run a search-and-replace on your site using a tool such as Better Search and Replace.
Make sure you take a database backup beforehand.
You will want to perform a search and replace for:
- multisite-url.com to singlesite-url.com
- uploads/sites/{{site_id}}/ to uploads/
That’s it!
Congratulations – you have split a single site out of a multisite instance.
Once you have verified that everything on the frontend and backend of the site is as expected, you can proceed to delete the site from the multisite network. To remove a subsite from the network, go to Network Admin > Sites. Under the site that you wish to remove click the Delete link.
