Why you should offload media to an external service:
Media files (image, video and audio files) are often quite large in size and can quickly use up your storage quota. Additionally, if your site is heavily using this type of media, it could become difficult to manage your available disk storage space optimally. The easiest solution in such situations is to offload media storage to an external service like an AWS S3 bucket using a plugin like WP Offload Media Lite, Media Cloud, or Offload Media – Cloud Storage. There are also other plugins which offer the ability to connect to AWS (and other cloud providers) which you can find by searching.
Steps to Offload WordPress Media to AWS S3:
The steps here are specifically for WP Offload Media Lite but should be similar for any connection. You can also find their guide here.
Set up your AWS account
- 1. Login to your Amazon Web Services (AWS) account. If you are a new user, you will need to sign up.
- 2. Once you have logged into the console, you will need to create a new IAM user by going here: https://console.aws.amazon.com/iam/home#/users.
- You should select Programmatic access.

- You should select Programmatic access.
- 3. Under the Permissions page, grant specific permissions to allow the new user to manage buckets and objects in the S3 service.
- 4. Click the “Attach existing policies directly” button, and then enter “s3” in the filter policies input box.
- 5. Select the “AmazonS3FullAccess” policy.
- You can always update this with a custom IAM policy later.

- Adding Tags is optional.
- You can always update this with a custom IAM policy later.
- 6. Click on “Next: Review” and if everything looks correct, click the “Create User” button


- 7. After the user is successfully created, you will see a screen with the Access Key ID and the Secret Access Key. Download these as .csv and save them somewhere safe.


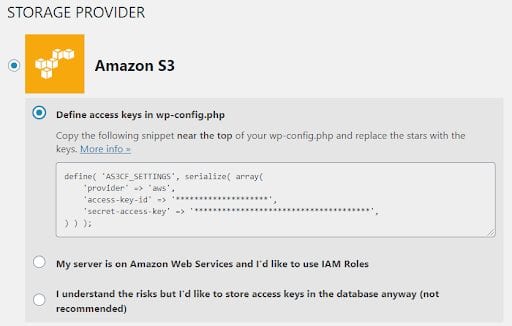
Defining AWS Access Keys
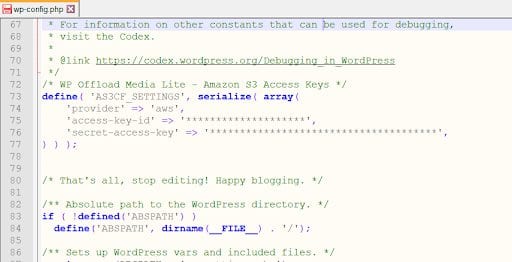
It is recommended to add the access keys through the wp-config.php file for security reasons. The code snippet is:
define( 'AS3CF_SETTINGS', serialize( array (
    'provider' => 'aws',
    'access-key-id' => 'YOUR_AWS_ACCESS_KEY',
    'secret-access-key' => 'YOUR_AWS_SECRET_KEY',
) ) );
This can be found in the plugin settings on your WordPress dashboard. These should be placed before /* That’s all, stop editing! Happy publishing. */ in the wp-config.php file.
Configure the Plugin
To start offloading newly uploaded WordPress media to AWS S3, an Amazon S3 bucket needs to be created. You will have to first sign up with Amazon S3 if you haven’t so already.
If you have already created an S3 bucket, you can just add the bucket name in the “Media Library” tab. Alternatively you can select “Create new bucket” and follow the instructions to set up a new S3 bucket.
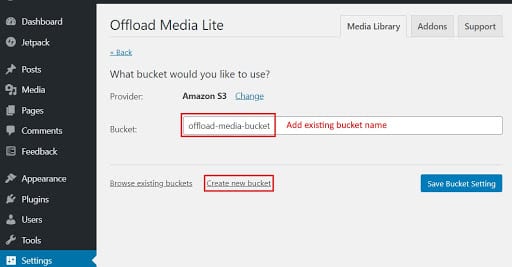
Once saved, the plugin will offload newly uploaded media to the bucket with the default settings.
Customizing Settings
The default settings are seen below. The few settings that we suggest you change are:
- – Force HTTPS ON as all the sites hosted by Pressable are HTTPS encrypted.
- – Remove Files From Server ON – this would help with better managing your disk space usage on Pressable.


If offloading your existing Media Library is something that you’d want to do, it would require a paid version of the Wp Offload Media plugin or you may be able to find other plugins which offer this option for free.
That’s all there is to it, your WordPress site is now all set up to offload media to Amazon S3!